diy
December 19, 2014
Gift Ideas: DIY Tea Gift Box and Coffee Box Sets
When it comes to office gifts I love doing more personal touches such as DIY gift. Not only is it more personal to do a DIY gift but cost effective too. These past couple of years I did little gift sets for my co-workers; a Hot Chocolate Mason Jar Kit (see here) and S'more Kit (see here). This year I decided to put together some tea and coffee gift box sets. This was super fun to do and easy to get all the supplies
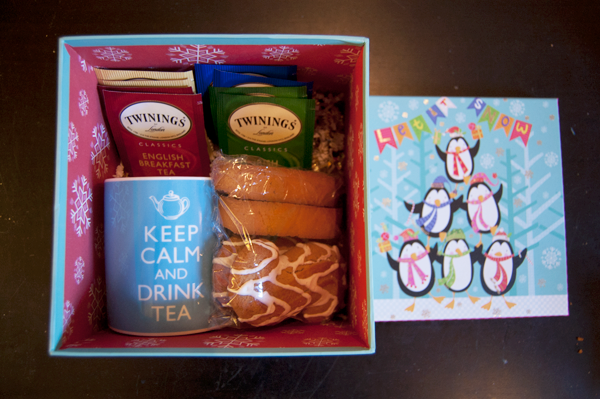
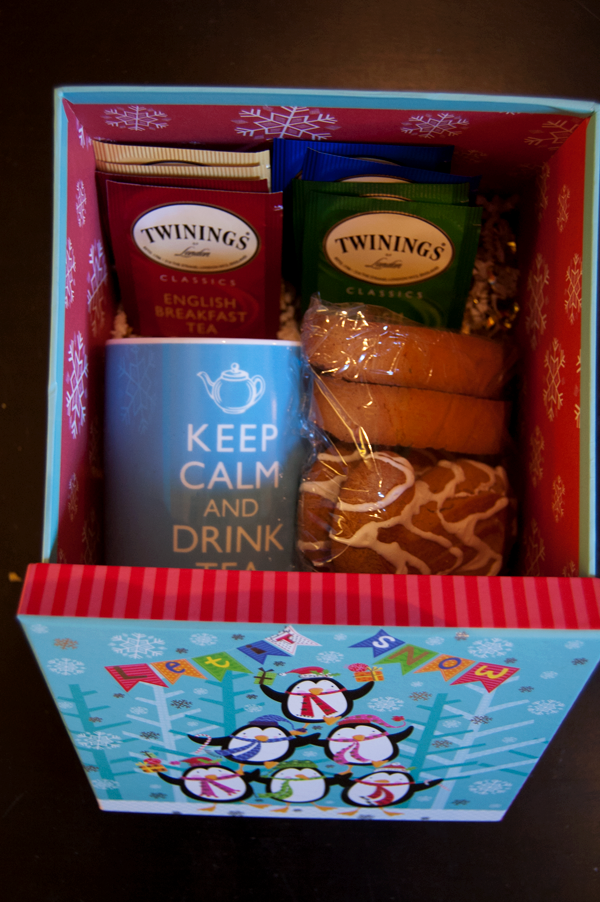
Tea Gift Box Set:


What You'll Need
- Christmas gift box (from Lot For Less can also find in Target. find here)
- Tea Mug (from Lot For Less, Target has really cheap and cute ones. Find here)
- Mix box of teas (bought two boxes of Twinnings mix boxes 20ct)
- Cookies or Biscottis
- Paper shreds (bought at Paper Source find shredded paper)
- Saran Wrap
- Seasonal Twine (bought at Paper Source find here)
- Christmas Tags (bought at Paper Source find here)
Step 1. Fill bottom of the box with paper shreds.
Step 2. Arrange your mug and teas into box.
Step 3. Wrap your cookies and biscottis in saran wrap to keep them fresh. I had did two of each kind of cookies.
Step 4. Place cookies into box.
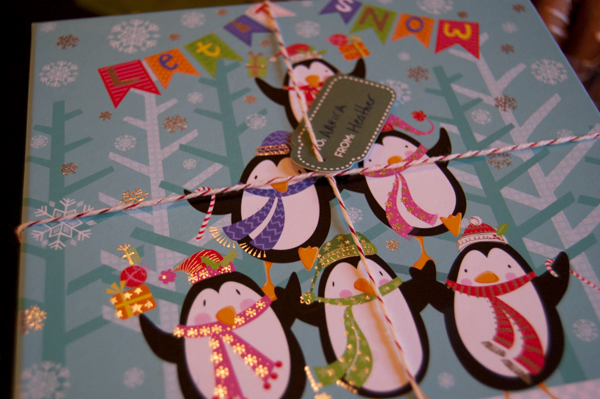
Step 5. Close the lip. Instead of using the twin to go all the way over the box twice I made it long enough to go over the box once and then over the top to tie the Christmas tag in place. Then I was able to tape the twine to the bottom of the box.
This the perfect little gift to give someone that you know is a tea drinker. You can personalize it with candy that you know they like or even a funny little mug that they will appreciate. You can even do loose teas and put in a tea infuser. Since I was making multiple ones of these I found it easier to just keep it simple.
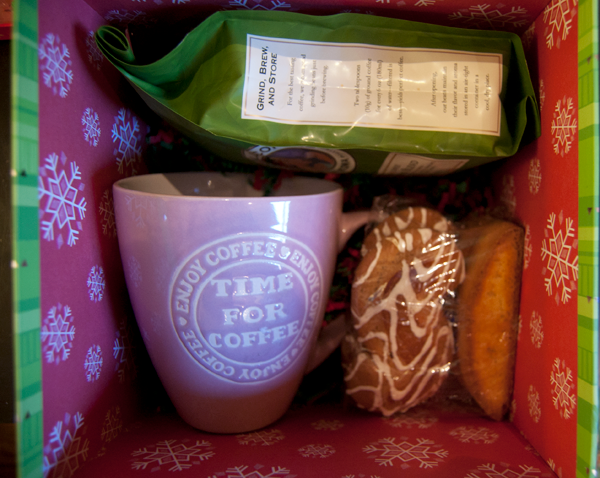
Coffee Gift Box Set:
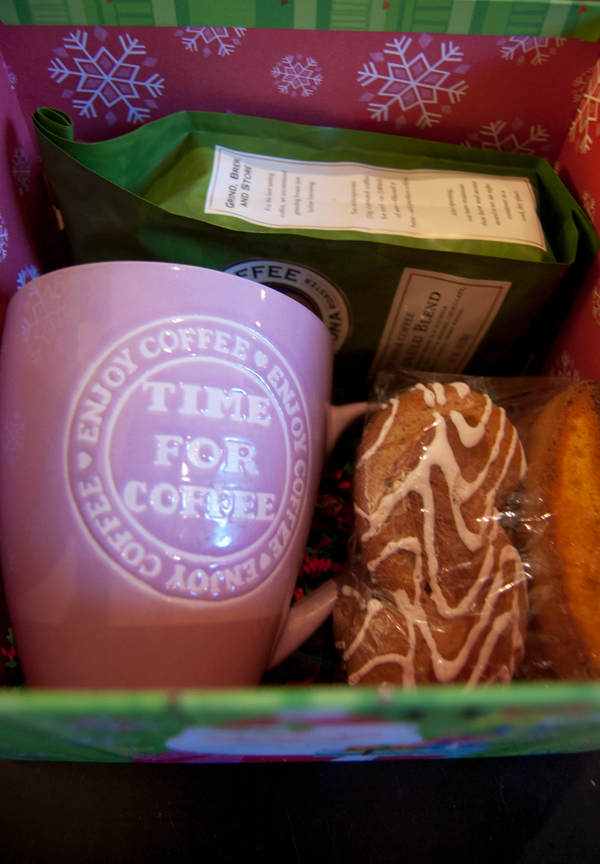


What You'll Need
- Christmas lid gift box (from Lot For Less can also find in Target. find here)
- Coffee Mug (from Lot For Less, Target has really cheap and cute ones. Find here)
- bag of coffee (bought mine from Honolulu Coffee Company)
- Cookies or Biscottis
- Paper shreds (bought at Paper Source find shredded paper)
- Saran Wrap
- Seasonal Twine (bought at Paper Source find here)
- Christmas Tags (bought at Paper Source find here)
Step 1. Fill bottom of the box with paper shreds.
Step 2. Arrange your mug and coffee bag/
Step 3. Wrap your cookies and biscottis in saran wrap to keep them fresh. I had did two of each kind of cookies.
Step 4. Place cookies into box.
Step 5. Close the lip. Instead of using the twin to go all the way over the box twice I made it long enough to go over the box once and then over the top to tie the Christmas tag in place. Then I was able to tape the twine to the bottom of the box.
Know a coffee drinker? This is perfect for the caffeine addicted. If you know they use K-Cups buy a variety pack or if you know their favorite coffee buy them a bag of that. You can even add in a french press or a giftcard to Starbucks (or any other coffee shop that they like).
Are you doing any DIY Christmas gifts this year?
November 3, 2014
DIY: Fall Mason Jar Decorations
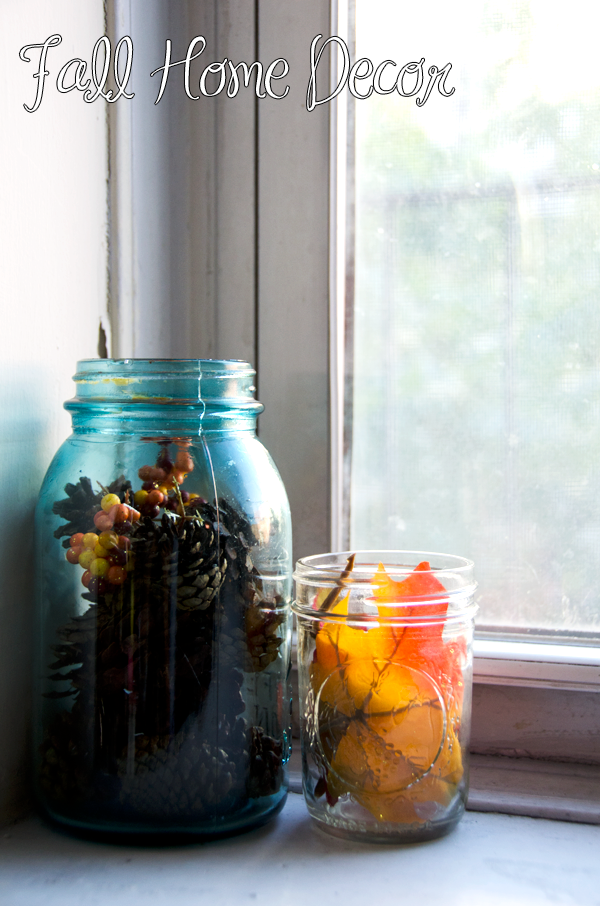


What You'll Need:
- Fake pine cones or acorns
- Fake fall leaves and flowers
- Mason Jars
All you need to do is line the jars you want with leaves. You don't need glue or modge podge to hold them in place. The leaves will be fine folded into the jar. You can place fake tea light candles in them to hold the leaves in place.
These decorations are not only perfect for making your home feel more like fall but also would be perfect center pieces for your Thanksgiving (or Friendsgiving) dinner.
Would you give making these a try?
June 25, 2014
Wedding Wednesday: DIY Fan Wedding Programs
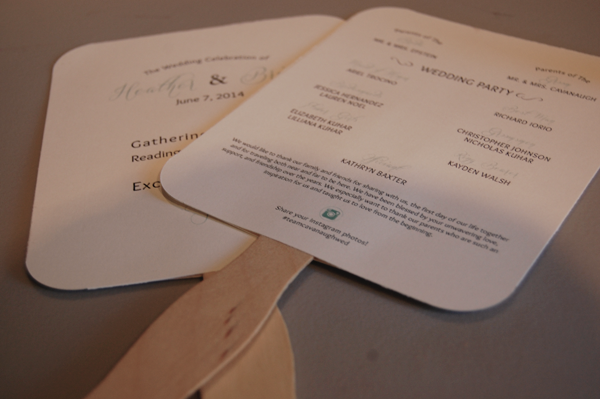

What You'll Need:
- Paper Stock with your programs pre-printed (paper should be thick, we used Paper Source's cover paper)
- Program Sticks (bought ours off of Amazon)
- Glue Sticks
- Paper Cutter
- Corner Puncher Rounder *optional* (ours was Martha Stewart from Amazon)


Step 1. Work on the layouts your programs and print them out before starting to build your fan program. We put our front and back information on two separate papers.
Step 2. Slice your paper to the size you need it to be. We used a paper cutter to keep all edges straight as well as to have them be the same size.
Step 3. Once you have the papers cut to the size you need, take your corner puncher and punch out the corners of your programs. If your able to I advise you to stick both This will give your programs a finished look.
Step 4. Flip your programs faced down. Use the glue stick and glue the backs of the programs. Glue the stick to one side and then add more glue to the stick. Align the programs before sealing together.

Thank god we did these fan programs since the day of our wedding it was about 80 degrees and sunny! It was nice to look out at our family and friends during the ceremony and see them actually using it. The process was pretty easy, well thankfully having a husband that can slice in a straight line helped. I was the corner puncher and paster for this crafty project.
I look forward to sharing photos from our day with you as well as more projects that we worked on.
December 23, 2013
DIY: Last Minute Christmas Gifts...S'more Kits
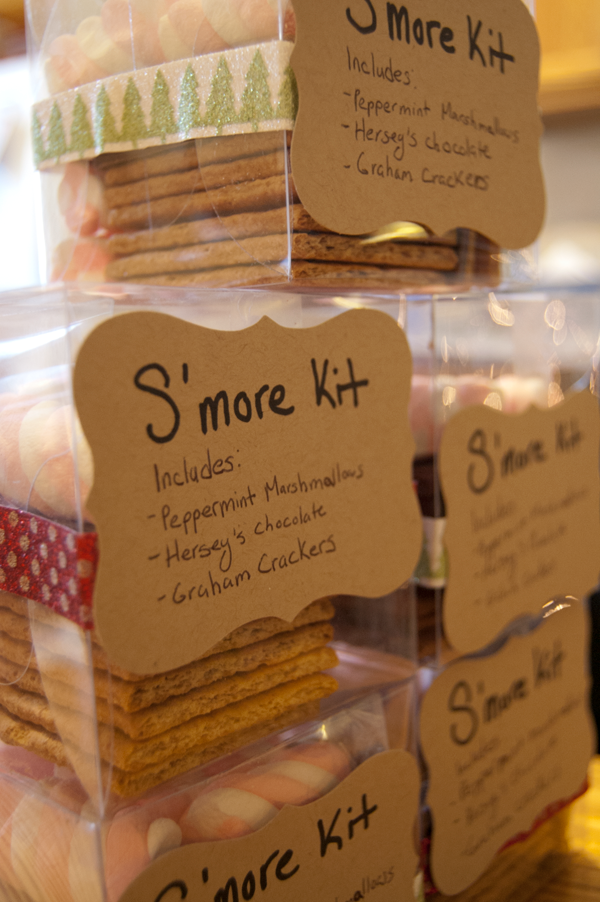

I love little homemade kits for Christmas presents. Last year for some of my co-workers I made hot chocolate jars, this year I decided to do little S'more kits. These projects are not only fun to make but fun to give. They are also the perfect last minute gift idea or for someone who is really hard to shop for.
What You Need:
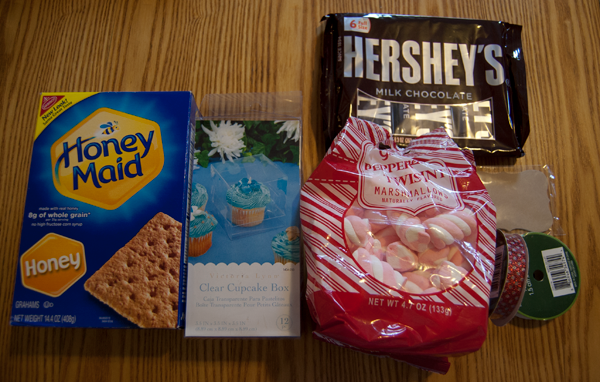

- A Box (i bought my clear plastic boxes from A.C. Moore)
- Hersey Chocolate Bars
- Graham Crackers
- Marshmallows
optional:
- Peppermint marshmallows (mine are from Target)
- Tags (from PaperSource)
- Washi Ribbon Tape (Michael's)
- Sharpie
Step 1. Assemble your boxes.
Step 2. Start layering your ingredients Graham Crackers then Hersey Chocolate, top it off with the marshmallows.
Step 3. Close boxes and secure with tape.
OPTIONAL STEP 4. Decorate your boxes using washi ribbon tape and tags.
Step 5. Give and Enjoy!
Step 2. Start layering your ingredients Graham Crackers then Hersey Chocolate, top it off with the marshmallows.
Step 3. Close boxes and secure with tape.
OPTIONAL STEP 4. Decorate your boxes using washi ribbon tape and tags.
Step 5. Give and Enjoy!


all photos taken by me
Do you have any last minute Christmas gifts?
December 16, 2013
Holiday Gifts of Giveaways: Your Own Darby Smart DIY Box

If you've been a reader for awhile on this blog you'll know that I'm a huge fan of DIY projects...or even if you just pursued my blog you'd noticed some DIY projects that I have done. That's why it was instant love when I stumbled upon Darby Smart! A company that sells DIY kits...which means not having to run around to different stores finding what you need?! YES PLEASE! Whether you love DIYing home products or fashion related project Darby Smart has you covered! Here at Fashionista NY Girl we have teamed up with Darby Smart to give ONE lucky reader a chance to win a Darby Smart box of their choice! You can keep your DIY project for yourself or give it a love one.
I got down and crafty with Darby Smart with one of my favorite boxes...the Chain Rhinestone Bracelet.


Watch: c/o Rakani | Bracelets: Bauble Bar and c/o Darby Smart
One lucky winner will win a Darby Smart box of their choice. Pick from any box on the site! To enter you MUST tweet us using the Rafflecopter entry telling us which Darby Smart box Santa can bring you on his sled. Contest end 11:59pm on December 22nd.
a Rafflecopter giveaway
December 13, 2013
DIY: Christmas Canvas Art
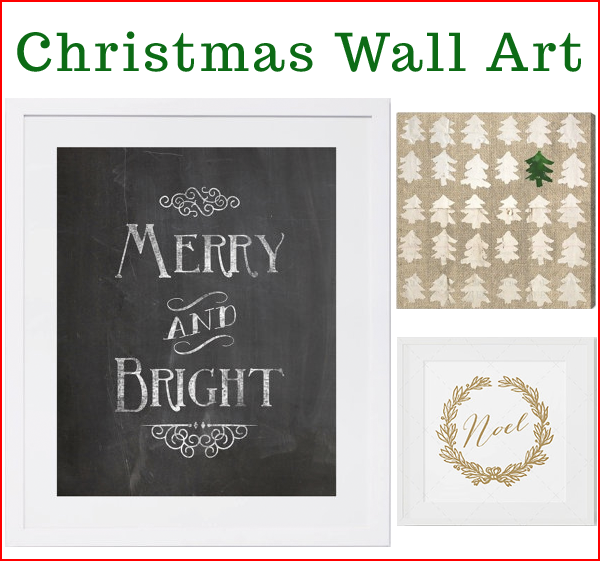

I'm a huge fan of the Holidays. I love decorating, listening to Christmas music and baking cookies. My fiance and I have started our own little traditions like spending an entire weekend just baking Christmas cookies (which include gingerbread, chocolate chip, peanut butter blossoms, and sugar cookies). Seriously though this is my favorite time of year! The only problem is that I LOVE Christmas decorations, I mean seriously could drop some serious cash on decorations. The problem is living in a one bedroom apt in Brooklyn does not give us enough room for storage. This season I'm really loving the Christmas canvas art work. I love the idea of hanging little signs around the apartment but like I said not enough room. What if I could create something cheaply and be able to reuse it? I got this idea of wrapping paper (NICE wrapping paper) covered canvases when the fiance and I were in Paper Source picking out our wedding invite papers. I fell for all of the Christmas wrapping paper, especially the fine paper assortment that they had. This would give me the option of reusing the canvases and wrapping them again in different printed papers after the Holiday season.
What you need:

- Fine Christmas Wrapping Paper (bought from Paper-Source 1 sheet of each: $2.50)
- Staple Gun
Step 1: Find the placement of your print on your canvas. This is especially important when doing a print that repeats.
Step 2: Once you find your placement of the print mark off the areas where you need to cut. Make sure you have enough paper to go around the back that you can staple it.
Step 3: Begin to cut your print out.
Step 4: Place your wrapping paper print side down (the back should be facing you), then place your canvas facing down as well. Before you being check the placement of your canvas and make sure your print is where you want it to be. Once you have it in place, act as if you were wrapping a gift. Staple gun the wrapping paper down to the back of the canvas. Two staples on each side should be enough.

[OPTIONAL] Step 5: Add a little bit of sparkle! I used a glue stick and loose white glitter from Michael's to add just a bit of sparkle to one of my canvases. It's up to you and what type of print.

Step 6: Hang and enjoy!


all photos taken by me
Once the season is over you can take them down and remove the staples from the back of the canvases and then re-wrap them in different fine paper! I already have a couple of finer paper in mind.
What do you think of this DIY project? Would you give it a try?
Subscribe to:
Posts (Atom)


